How To Upload And Publish Visual Studio 2012 Project To GitHub
Hello,
In this tutorial, I will demonstrate on how to upload and publish a Visual Studio 2012 project to GitHub. Steps 1 and 2 are needed because editions of Visual Studio (2013 and 2015) has built-in extension for Git. So to start with, perform the detailed steps below.
1. Close all instance of Visual Studio. Download and Install Visual Studio 2012 Update 4 (Latest Update)
2. Download and Install Visual Studio Tools for Git. (Search in marketplace.visualstudio.com)
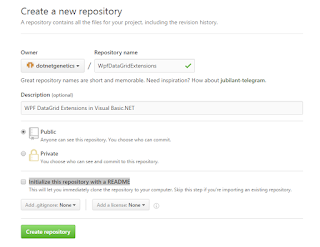
3. Create a sample Repository. (Uncheck Initialize this repository with a README)
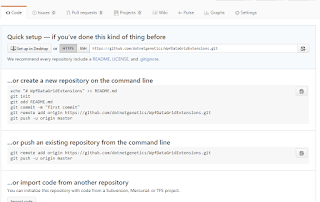
4. Copy the url generated by the repository with .git extension. This will be used when you publish the project.
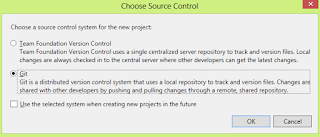
5. Open Sample project to be committed. Right click on the solution and choose Git instead of Team Foundation Version Control.
6. Open Team Explorer via View Menu (View-> Team Explorer).
7. Click Home (Home icon) and then choose Changes. This will open up the project in which you can select files to be Included or Excluded to be checked-in/committed. Add your commit message and then click Commit.

8. This will show a success commit message with the Commit ID.
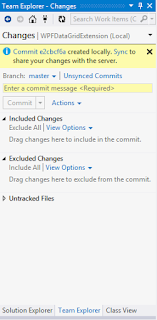
9. Next Click Sync to share changes with the server.
10. When prompted with Publish to Remote Repository, just enter the Git url generated when creating the repository. Then click Publish.
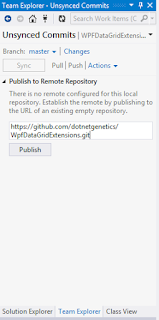
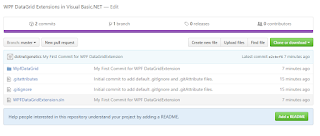
11. Refresh the newly created repository in Github. You should be able to view the solution file including the project.
That's it.. :-)
In this tutorial, I will demonstrate on how to upload and publish a Visual Studio 2012 project to GitHub. Steps 1 and 2 are needed because editions of Visual Studio (2013 and 2015) has built-in extension for Git. So to start with, perform the detailed steps below.
1. Close all instance of Visual Studio. Download and Install Visual Studio 2012 Update 4 (Latest Update)
2. Download and Install Visual Studio Tools for Git. (Search in marketplace.visualstudio.com)
3. Create a sample Repository. (Uncheck Initialize this repository with a README)

4. Copy the url generated by the repository with .git extension. This will be used when you publish the project.

5. Open Sample project to be committed. Right click on the solution and choose Git instead of Team Foundation Version Control.

6. Open Team Explorer via View Menu (View-> Team Explorer).
7. Click Home (Home icon) and then choose Changes. This will open up the project in which you can select files to be Included or Excluded to be checked-in/committed. Add your commit message and then click Commit.

8. This will show a success commit message with the Commit ID.

9. Next Click Sync to share changes with the server.
10. When prompted with Publish to Remote Repository, just enter the Git url generated when creating the repository. Then click Publish.

11. Refresh the newly created repository in Github. You should be able to view the solution file including the project.

That's it.. :-)


Comments
Post a Comment