Posts

Showing posts with the label VIsual Studio 2019

Donate

How To Publish Visual Studio 2019 .NET Applications Or Projects To GitHub Using GitHub Extension

Image
Hello and Good day! Here's a step by step demonstration on how to upload or publish your C#, VB.NET or ASP.NET projects to Github using Visual Studio GitHub extension. Download and install the GitHub Extension for Visual Studio from the Visual Studio MarketPlace. After installing the GitHub Visual Studio Extension, navigate to the Team Explorer pane and click the Github Sign-in link. The default browser will launch the GitHub login page, that will require you to supply the username and password. When logged-in to Github, go back to your project, right click on the Project Solution and then click the Create GIT Repository . The Create a Git repository dialog will pop-up wherein you need to fill out the required information under the Create a new GitHub repository section. Once completed, click the Create and Push button. Go to your GitHub page and you may notice that the repository has been created along with the source code that's published. Cheers!

Visual Studio Error - This Emulator Does Not Have Hardware Acceleration Enabled In Xamarin And .NET MAUI

Image
Good day! After switching laptops and running some of my Xamarin Forms projects and simple .NET Maui applications, I encountered this error This Emulator Does Not Have Hardware Acceleration. Since this is a new laptop, I need to setup and enable the firmware virtualization and Hyper-V for Windows 10 operating system. First is I need to open the BIOS interface of the laptop and look for the Virtualization Technology under Security tab. By default, it's disabled Next is to enable it and then save changes. After modifying the BIOS settings for virtualization, you need to enable Hyper-V and Windows Hypervisor Platform checkboxes thru the Turn Windows Features On or Off application. Then restart your laptop or machine. Once I made those changes, I was able to run my applications using the Android emulator in Visual Studio. Cheers!

Install And Integrate Tailwind CSS 3.0 In ASP.NET Core MVC 5.0 Web Application

Image
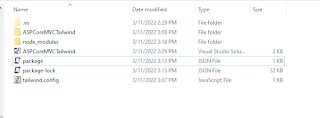
Hi Felas! In this post, I will now demonstrate on how to integrate Tailwind CSS into an empty ASP.NET Core 5.0 MVC Web Application and the steps used where taken from my previous post on How To Install Tailwind CSS 3.0 Using Tailwind CLI And Visual Studio Code In Your Web Project Project Setup 1. Create a new ASP.NET Core MVC project using Visual Studio 2019. 2. Once created, add two empty css files called input.css and output.css inside the css subfolder of wwwroot. 3. In your _Layout.cshtml page, comment out or remove the code that references both the bootstrap.min.css and site.css files. 4. Replace that with output.css. For now this is just an empty stylesheet file and after the CLI build is done, this file will be populated with Tailwind css codes. Installing Tailwind CSS using CLI command 1. Open Package Manager Console in Visual Studio 2019 (Tools -> NuGet Package Manager -> Package Manager Console). 2. Run create package.json command. This will eventually ad

Creating Your First Notepad++ Plugin Using Visual Studio 2019 And C#

Image
Hello, In this blog post, I'll demonstrate on how to develop a Notepad++ Plugin (64 Bit) using Visual Studio 2019 and C# assuming that you have installed a 64 Bit version of the latest Notepad++ Editor. This tutorial is based from kblisted Notepad++ Plugin Package in GitHub . The plugin's architecture can communicate with the Notepad++ or the underlying Scintilla engine using NotepadPlusPlusGateway and ScintillaGateWay and Win32 API. To start with, download the Notepad++ Plugin Pack from the GitHub page and copy the zip file to the Project Templates folder of your Visual Studio 2019 IDE. In my laptop, the path is "C:\Users\my_username\Documents\Visual Studio 2019\Templates\ProjectTemplates\Visual C#" . Open your Visual Studio 2019 IDE and create a project using the Notepad++ Plugin template. Change the Platform Target to x64. (Our OS is Windows 10 64 bit) Create a function called SetFirstCharAllWordsCap inside Main.cs that get's the entire string content

Activate Or Show Windows Forms Missing Controls Including BindingNavigator In .NET 5 or .NET Core Winforms Application

Image
Gents Good Day! There was a question on forums on why the BindingNavigator control was either missing or grayed out in Visual Studio Toolbox of which the project's target framework is .NET 5. I decided to create a C# Windows Forms application using Visual Studio 2019 that targets the .NET 5 framework and infact, the BindingNavigator control is missing. After searching the net, I found an interesting link in StackOverflow Activate missing Winforms controls in .Net Core 3.1 which is applicable to .NET Core 3.1. I applied the steps stated in the post's answer to the Windows Forms project that I created and it works. Below are the steps to do that. 1. Comment Application.SetHighDpiMode(HighDpiMode.SystemAware); code in Program.cs file. static void Main() { //Application.SetHighDpiMode(HighDpiMode.SystemAware); Application.EnableVisualStyles(); Application.SetCompatibleTextRenderingDefault( false ); Application.Run( new Form1()); }

How To Enable Add COM Reference In A .NET Core Application Using Visual Studio 2019

Image
Hello, When creating a project using Visual Studio 2019 like for example a Console App and you might want to reference a certain COM library, you might wonder why the Add COM Reference is not found on the context menu when you right clicked the project. This usually happens if you perform a fresh install of the Visual Studio 2019 IDE on your machine. So to enable the Add COM Reference, simply follow the steps below: 1. Upgrade VS 2019 to latest version. As of now, the latest update is version 16.8.6. 2. Set the Target framework of your console app to .NET Core 3.0. But I recommend .NET Core 3.1     framework. 3. Right click on the console app project or the Dependencies. You should be able to see Add COM Reference from the context menu. 4. Search for a COM Libary. Ex. Microsoft Excel 16.0 Object Library. 5. Add to your Project. That's it!

WPF MVVM - No connection string named 'MyEntities' could be found in the application config file.

Image
Hello Team, While working on a simple WPF MVVM application using Entity Framework 6.x and Visual Studio 2019, I encountered this strange error No connection string named 'MyEntities' could be found in the application config file . However, if I compile and debug my application, it would proceed with running the project. I've searched lots of information and most of the solutions presented were to copy the web.config or app.config file from a class library to the project that is set as the startup application. One thing I've noticed though is that this error appears only on the XAML page of where the DataContext is assigned. After doing some experiments of modifying my application, I came up with a solution that is instead of setting the DataContext in the XAML like below: <Window.DataContext> <viewModel:StudentViewModel/> </Window.DataContext> I assigned the DataContext in the code behind of the MainWindow and thus the error message disappeared.

Donate