Posts

Showing posts from 2021

Donate

Activate Or Show Windows Forms Missing Controls Including BindingNavigator In .NET 5 or .NET Core Winforms Application

Image
Gents Good Day! There was a question on forums on why the BindingNavigator control was either missing or grayed out in Visual Studio Toolbox of which the project's target framework is .NET 5. I decided to create a C# Windows Forms application using Visual Studio 2019 that targets the .NET 5 framework and infact, the BindingNavigator control is missing. After searching the net, I found an interesting link in StackOverflow Activate missing Winforms controls in .Net Core 3.1 which is applicable to .NET Core 3.1. I applied the steps stated in the post's answer to the Windows Forms project that I created and it works. Below are the steps to do that. 1. Comment Application.SetHighDpiMode(HighDpiMode.SystemAware); code in Program.cs file. static void Main() { //Application.SetHighDpiMode(HighDpiMode.SystemAware); Application.EnableVisualStyles(); Application.SetCompatibleTextRenderingDefault( false ); Application.Run( new Form1()); }
SQLBulkCopy Error - The given value of type String from the data source cannot be converted to type nvarchar of the specified target column. String or binary data would be truncated.

Image
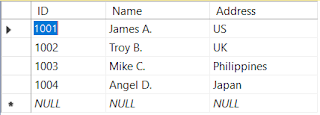
Good day! Normally, in a situation where you want to inject thousands of rows to the database using C# and SQL Server, the optimal solution would be using built-in SQLBulkCopy() function. However, you may encounter the error message "The given value of type String from the data source cannot be converted to type nvarchar of the specified target column. String or binary data would be truncated." The code below works but in some instance may throw that kind of exception. private bool SQLBulkCopy<T>( string SqlConn, List<T> inList, string tableName, ref string errMsg, int optBatchSize = 5000, bool optTableLock = true ) { SqlBulkCopyOptions lockType; SqlTransaction transaction; if (optTableLock) lockType = SqlBulkCopyOptions.TableLock; else lockType = SqlBulkCopyOptions.Default; try { using ( var connection = new SqlConnection(SqlConn)) { connection.Open(); transaction = connection.BeginTransaction(); using ( var bulkCopy

Async Fetch Not Working When Retrieving Data From JSONPlaceholder API In JavaScript And Vue.JS

Image
Hello, I was trying to retrieve data from a Free Fake API website called JSON Placheholder using the code below which using asynchronous behavior. However, this does'nt return data after all. async getDataAsync(){ try { let response = await fetch( 'http://jsonplaceholder.typicode.com/todos' ); console.log(response.data); this .todos = response.data; } catch (error) { console.log(error); } After doing some research, I came up with a solution and replace the code above using JavaScript Promise as a means to retrieve data from the Fake API website in an asynchronous manner. await fetch( 'http://jsonplaceholder.typicode.com/todos' ) .then(response => response.json() ) .then(data => { this .todos = data; }) . catch (error => { return Promise.reject(error); }); } Cheers!

Axios.Get HTTP Client Not Returning Data From API In Vue.js

Image
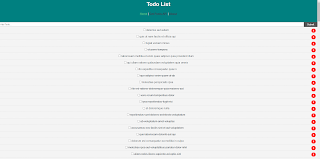
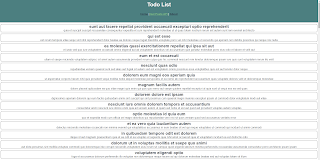
Good day! I was following a tutorial on how to create a simple tutorial on how to create a Todo List project that retrieves data from a dummy API website in Youtube using the Axios HTTP Client Library. However fetching the API data from jsonplaceholder.typicode.com using Axios get() method does'nt return any results and the browser just rendered the white screen of death. After reading through my code thoroughly, I noticed that I have misplaced the created event inside the methods property which is the culprit of the issue. export default { name: 'home' , components: { Todos, Header, AddTodo }, data(){ return { todos:[], } }, methods:{ deleteTodo(id){ console.log(id); axios. delete (`https: //jsonplaceholder.typicode.com/todos/${id}`) .then(res => { this .todos = this .todos.filter(todo => todo.id !== id) return res }) . catch (error => {

Getting Started With Bootstrap-Table In An ASP.NET Core MVC 5 Web Application With Entity Framework Core And SQL Server

Image
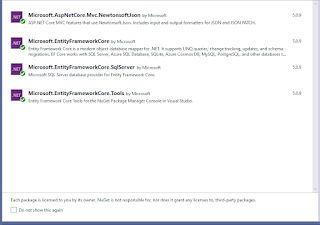
Hello, In this tutorial, I will demonstrate on how to integrate Bootstrap-Table created by Wenzhixin in an ASP.NET Core MVC 5 with Entity Framework Core and SQL Server. For this post, I'll be using Microsoft's free database called ContosoRetailDW. Most of the ASP.NET MVC 5 web project in our company use this widget for showing records to clients because this has tons of features like exporting, paging, searching, sorting by column names and a whole lot more and this awesome widget has been constantly improved by the product owner and some dedicated developers. Project Setup 1. Lets start by creating an ASP.NET Core MVC application targeting the latest framework which is .NET 5 using Visual Studio 2019. 2. Add these NuGet packages for Entity Framework Core and ASP.NET Core MVC Newtonsoft.Json 3. Next is to reverse engineer the ContosoRetailDW so that we can use it's tables. The bootstrap-table widget will load records from DimPromotions table. Scaffold-DbContext "

Using Unity IoC Container Dependency Injection, Dapper ORM and SQL Server In Visual Basic .NET Core Or .NET 5 Application

Image
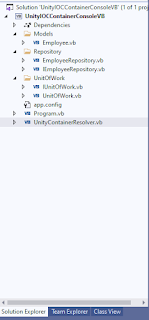
Hi All, This article is the VB.NET version of this post Getting Started With Unity IoC Container Dependency Injection In .NET Core Using Entity Framework Core ORM And SQL Server . We will create a .NET Core Console Application that will utilize the Unity IoC Container for Dependency Injection, SQL Server and Dapper ORM. Instead of using Entity Framework, I'm using Dapper ORM coz EF does not support reverse engineering in .NET Core. There are existing power tools or other solutions on how to reverse engineer a database table but for now I'll just use Dapper. I'll be using Microsoft's sample database called ContosoRetailsDw as the datasource of this tutorial. Project Setup 1. Start off by creating a Visual Basic .NET Core Console Application targetting the latest framework which is .NET 5.0 2. Add three new folders Models, Repository and UnitOfWork. These folders contain the model and DAL classes used in this project. 3. Add the following NuGet packages: Dapper O

Generic Method With BitConverter.GetBytes() Throws Error: CS1503 Argument 1: cannot convert from 'T' to 'bool'

Image
Hello And Good Day! There was a post in VBForums Generic Method with BitConverter.GetBytes problem on how to pass a T variable without causing the issue CS1503 Argument 1: cannot convert from 'T' to 'bool' private static byte [] GetBytes<T> (T valu) { var bytes = BitConverter.GetBytes(valu); if (BitConverter.IsLittleEndian) Array.Reverse(bytes); return bytes; } Since Generic Constraints for a numeric types isn't available at this time, I attempted to solve this issue by checking the type of T and then perform the conversion explicity. private static byte [] GetBytes<T>(T value ) { byte [] bytes; ushort val1; uint val2; Type t = typeof (T); if (t == typeof ( ushort )) { val1 = Convert.ToUInt16( value ); bytes = BitConverter.GetBytes(val1); } else if (t == t

How To Create Or Generate PDF Reports Or Files Using DinkToPDF in .NET 5 or .NET Core Console Application

Image
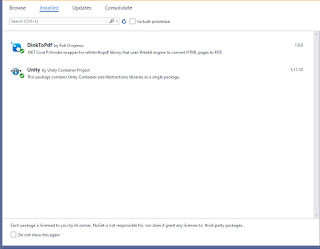
Good day! In this tutorial, I will demonstrate on how to create or generate PDF reports or files using DinkToPDF in .NET 5 or .NET Core Console Application. This library is a C# .NET Core wrapper for wkhtmltopdf library that uses the Webkit engine to convert HTML files or page to PDF and was developed by 'rdvojmoc Rok Dvojmoč' from Slovenia. To begin with lets start by establishing the project structure. Project Structure 1. Create a .NET 5 or .NET Core Console Application Project. 2. Add DinkToPDF and Unity packages using NuGet. 3. Copy the libwkhtmltox (dll, dylib and so) files from DinkToPDF and attach those files to your project. Make sure to set the Copy to Output Directory attribute of those files to Copy Always . Note that there are two versions for these files,32 and 64 bit. 4. Create three folders to the project and in each folder add the empty classes or interface shown in step #6. 5. Add an empty html file called ReportTemplate inside the project and set

Donate