Posts

Showing posts from September, 2023

Donate

How To Close A Window Via Click Command Using MVVM In WPF

Image
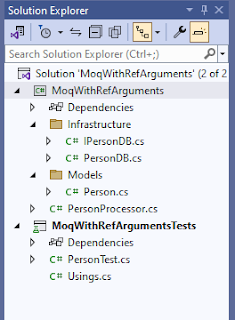
Good day! Here's a simple WPF tutorial on how to close a window in WPF thru button click which applies the MVVM pattern. For simplicity sake, I'll demonstrate by using Menu item with a command to close the window. Start by creating a WPF project that target's the latest framework and add classes for DelegateCommand, MainViewModel and ViewModelBase inside a ViewModels folder. See below project setup. Add the code for ViewModelBase class that implements the INotifyPropertyChanged interface. public class clsViewModelBase : INotifyPropertyChanged { public event PropertyChangedEventHandler PropertyChanged; protected void OnPropertyChanged( string propertyName) { if (PropertyChanged != null ) PropertyChanged( this , new PropertyChangedEventArgs(propertyName)); } } Next is to add the functionality of the DelegateCommand class that implements the ICommand interface. This class handles the Commands bound to the WPF controls pu

WPF Menu Item Drop Alignment Appears To The Left Instead Of Right In Windows 10

Image
Hello, I was assigned a new laptop and when I ran several of my WPF applications into this machine, I suddenly noticed that the menu items drop alignment appears to the left instead of right. Since this is a OS setting, we need to change some values in the registry. Open registry editor and navigate to this registry path -> Computer\HKEY_CURRENT_USER\SOFTWARE\Microsoft\Windows NT\CurrentVersion\Windows . Change the MenuDropAlignment value from 1 to 0 similar to the picture below. Once done changing the value, make sure to reboot your machine for this changes to take effect. After that, your menu item drop alignment changes from left to right. Output Cheers!

Using OpenFileDialog Or MessageBox In .NET Core Class Library Project With WPF Application

Image
Good day Team! Given that you need to access the OpenFileDialog or MessageBox Dialog In Your .NET Core Class Library that is part of a solution that contains a WPF project, there's an easy hack provided by our Solutions Architect that is to hand hack the .csproj settings. First is to open the .csproj file using an editor. Inside Property Group node, add enable WPF by adding a UseWPF element with the value of true such as below. <Project Sdk= "Microsoft.NET.Sdk" > <PropertyGroup> <TargetFramework>net7.0-windows10.0.17763.0</TargetFramework> <ImplicitUsings>enable</ImplicitUsings> <Nullable>enable</Nullable> <UseWPF>true</UseWPF> </PropertyGroup> <ItemGroup> <PackageReference Include= "Company.Utilities.CompanyLibNET7" Version= "1.0.0.3" /> <PackageReference Include= "Microsoft.Extensions.DependencyInjection" Version= "7.

How To Download GitHub Source Code Using Mobile Device

Image
Good day! Given that you have a difficulty downloading a specific source code from github using the mobile device like screenshot below, here's a solution on how to do it using the google chrome mobile browser. First is to click the elipse (3 dots vertically aligned) button beside the url textbox. Scroll down the drop down box and check Desktop Site Once enabled, your browser will show the desktop view of github page and the Code button colored green appears as expected. You may now proceed with downloading the source code. Cheers!

Mocking Methods With Ref Arguments Using Moq Framework In C#

Image
Hello, Here's a straightforward post on how to mock methods with arguments that are passed by reference using the Moq framework. First, we need to create a C# Class Library and Xunit projects in Visual Studio. Create two folders in the class libary project specifically Infrastructure and Models. The structure of the application resembles the image below. Add a class to hold a person's information Person.cs inside the models folder with properties such as SocialSecurityID, FirstName and etc. Only the StatusUpdate property is used in the test project. public class Person { public int SocialSecurityID { get ; set ; } public string FirstName { get ; set ; } public string MiddleName { get ; set ; } public string LastName { get ; set ; } public string StatusUpdate { get ; set ; } public Person() { SocialSecurityID = 0; FirstName = string .Empty; MiddleName = string .Empty; LastName = string .E

How To Add Cell Borders Or Grid Lines To Filled Cells In Excel Using ClosedXML

Image
Hello, When dealing with filled cells or columns of an Excel workshet via ClosedXML, you may notice that after you produced the Excel file(s), the filled columns or cells don't have borders. This assume that your report does not apply borders to the used cells or columns such as the image below. To apply borders to certain columns within a range or not, you need to set both the Outside and Inside borders with Thin borderstyle. And then apply your preferred color to the top, bottom, left and right borders. row++; xlWSheet.Range( 1 , 1 , row, 7 ).Style.Border.SetOutsideBorder(XLBorderStyleValues.Thin) .Border.SetInsideBorder(XLBorderStyleValues.Thin) .Border.SetTopBorderColor(XLColor.LightGray) .Border.SetBottomBorderColor(XLColor.LightGray) .Border.SetLeftBorderColor(XLColor.LightGray) .Border.SetRightBorderColor(XLColor.LightGray); Filled columns or cells with borders. Cheers!

Donate