Posts

Showing posts from February, 2021

Donate

How To Enable Add COM Reference In A .NET Core Application Using Visual Studio 2019

Image
Hello, When creating a project using Visual Studio 2019 like for example a Console App and you might want to reference a certain COM library, you might wonder why the Add COM Reference is not found on the context menu when you right clicked the project. This usually happens if you perform a fresh install of the Visual Studio 2019 IDE on your machine. So to enable the Add COM Reference, simply follow the steps below: 1. Upgrade VS 2019 to latest version. As of now, the latest update is version 16.8.6. 2. Set the Target framework of your console app to .NET Core 3.0. But I recommend .NET Core 3.1     framework. 3. Right click on the console app project or the Dependencies. You should be able to see Add COM Reference from the context menu. 4. Search for a COM Libary. Ex. Microsoft Excel 16.0 Object Library. 5. Add to your Project. That's it!
How To Setup Power BI On-Premises Data Gateway In Power BI Service

Image
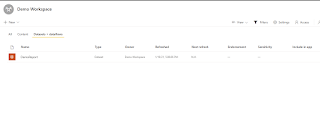
Hello Gents, Here's how to setup a Power BI On-Premises Data Gateway to a On-Premises data source like Microsoft SQL Server or any other databases in Power BI Service so that you don't have to move your datasources elsewhere. The idea of a gateway is to keep your reports in the Power BI Service up to date of it's content through Schedule refresh or live connectivity. This is important so that stakeholders and top management can access the reports anytime through the app or website with updated information. So to setup a Power BI Data Gateway in your machine, just follow the steps provided below to accomplish the task at hand. I. Download Data Gateway For The Reports 1. Download datagateway from Microsoft Powerbi website: Connect to on-premises data sources with a Power BI gateway 2. Sign-in with your personal or domain account. 3. Choose on-premises data gateway (recommended) 4. Choose register a new gateway on this computer if fresh install. 5. Fill out on-premise

WPF CRUD Application Using DataGrid, MVVM Pattern, Entity Framework, And VB.NET

Image
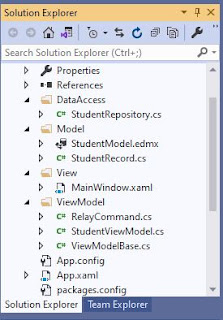
Good day guys! Here's the VB.NET version of this article WPF CRUD Application Using DataGrid, MVVM Pattern, Entity Framework, And C#.NET which is a CRUD (Create,Update and Delete) application using the DataGrid control, ADO.NET Entity Framework 6.x and Model–View–Viewmodel(MVVM) architectural pattern. The project structure and the logic were derived from that article except that this application incorporates Visual Basic.NET/VB.NET as the programming language. I. Project Setup 1. Create a table in your database called Students using the script from this post WPF CRUD With DataGrid, Entity Framework And C#.NET . 2. Create a WPF Project and add four folders called DataAccess, Model, View and ViewModel. The project structure may resemble with the screenshot provided below. II. Coding The Model and Repository Class 1. Inside the Model folder, add an ADO.NET Entity Data Model object that connects to the Students table in your database. On my part, I named it StudentModel . 2. Fo

WPF CRUD Application Using DataGrid, MVVM Pattern, Entity Framework, And C#.NET

Image
Good day to all! Here's an example of a WPF CRUD (Create,Update and Delete) project using the DataGrid control, ADO.NET Entity Framework 6.x, C#.NET and Model–View–Viewmodel(MVVM) architectural pattern. This post was based from this tutorial WPF CRUD With DataGrid, Entity Framework And C#.NET except that we are now using the MVVM framework. The steps below are pretty straightforward and easy to follow. I. Project Setup 1. Add a table called Students in you database. The complete script is found in this post WPF CRUD With DataGrid, Entity Framework And C#.NET 2. Create a WPF Project and add four folders called DataAccess, Model, View and ViewModel. 3. Your project structure may look similar with the screenshot provided below. II. Coding The Model and Repository Class 1. Inside the Model folder, add an ADO.NET Entity Data Model that connects to the Students table in your database. On my part, I named it StudentModel . 2. For the connectionstring name in App.config file, I

Donate