How To Install Tailwind CSS 3.0 Using Tailwind CLI And Visual Studio Code In Your Web Project
Hello and Good afternoon!
 2. Install the Tailwind CSS framework using CLI command "npm install -D tailwindcss" via Visual Studio Code terminal.
3. Execute the init CLI command "npx tailwindcss init" to create a tailwind.config.js file.
4. Configure the template paths in tailwind.config.js.
6. Add the Tailwind directives to the styles.css file. This will import the base, components and the utilities of the framework.
7. Start the Tailwind CLI build process using CLI command "npx tailwindcss -i ./css/styles.css -o ./dist/output.css --watch". This will create a distribution folder with an output.css file.
New Directory Structure after the CLI build process
2. Install the Tailwind CSS framework using CLI command "npm install -D tailwindcss" via Visual Studio Code terminal.
3. Execute the init CLI command "npx tailwindcss init" to create a tailwind.config.js file.
4. Configure the template paths in tailwind.config.js.
6. Add the Tailwind directives to the styles.css file. This will import the base, components and the utilities of the framework.
7. Start the Tailwind CLI build process using CLI command "npx tailwindcss -i ./css/styles.css -o ./dist/output.css --watch". This will create a distribution folder with an output.css file.
New Directory Structure after the CLI build process
 8. Start using Tailwind in your HTML by referencing the output.css file.
That's it folks!
In this post, I will demonstrate on how to install Tailwind CSS 3.0 which is the latest version as of this writing using Tailwind CLI and Visual Studio Code Terminal. The steps presented in this article are derived solely from the documentation which is then applied to an empty web project using Visual Studio Code IDE and it's built-in terminal. This framework was introduced to me by a ex-colleague of mine who's now focused on working with the latest front-end JavaScript and CSS frameworks. According to the documentation, Tailwind CSS is a highly customizable, low-level CSS framework that gives you all of the building blocks you need to build bespoke designs without any annoying opinionated styles you have to fight to override. In a nutshell, it is a utility-first CSS framework for rapidly building custom designs. Ok enough talk and let's get down to business.
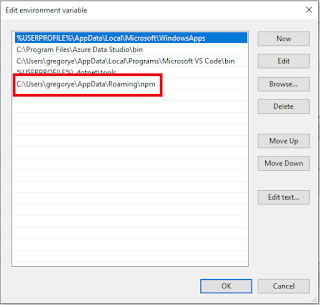
1. Create a projects folder called test-project with three subdirectories namely css, images and src. Inside the css folder, create a new file called styles.css. In src folder, this is where your html or JavaScript files are located. Only the styles.css will be affected during the setup. Drag that folder into the Visual Code IDE. As a reminder, please download and install node.js into your machine if you have'nt installed this yet.
D:\Projects\Tailwind CSS\test-project> npm install -D tailwindcss
D:\Projects\Tailwind CSS\test-project> npx tailwindcss init
module.exports = {
 content: ["./src/**/*.html"],
 theme: {
	extend: {},
 },
 plugins: [],
}
@tailwind base;
@tailwind components;
@tailwind utilities;
D:\Projects\Tailwind CSS\test-project> npx tailwindcss -i ./css/styles.css -o ./dist/output.css --watch
<link href="/dist/output.css" rel="stylesheet">
That's it folks!
Comments
Post a Comment