Posts

Donate

Using Unity IoC Container Dependency Injection, Dapper ORM and SQL Server In Visual Basic .NET Core Or .NET 5 Application

Image
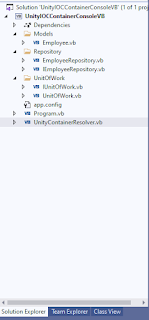
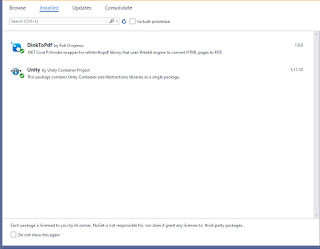
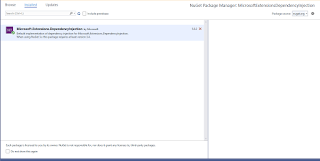
Hi All, This article is the VB.NET version of this post Getting Started With Unity IoC Container Dependency Injection In .NET Core Using Entity Framework Core ORM And SQL Server . We will create a .NET Core Console Application that will utilize the Unity IoC Container for Dependency Injection, SQL Server and Dapper ORM. Instead of using Entity Framework, I'm using Dapper ORM coz EF does not support reverse engineering in .NET Core. There are existing power tools or other solutions on how to reverse engineer a database table but for now I'll just use Dapper. I'll be using Microsoft's sample database called ContosoRetailsDw as the datasource of this tutorial. Project Setup 1. Start off by creating a Visual Basic .NET Core Console Application targetting the latest framework which is .NET 5.0 2. Add three new folders Models, Repository and UnitOfWork. These folders contain the model and DAL classes used in this project. 3. Add the following NuGet packages: Dapper O

Generic Method With BitConverter.GetBytes() Throws Error: CS1503 Argument 1: cannot convert from 'T' to 'bool'

Image
Hello And Good Day! There was a post in VBForums Generic Method with BitConverter.GetBytes problem on how to pass a T variable without causing the issue CS1503 Argument 1: cannot convert from 'T' to 'bool' private static byte [] GetBytes<T> (T valu) { var bytes = BitConverter.GetBytes(valu); if (BitConverter.IsLittleEndian) Array.Reverse(bytes); return bytes; } Since Generic Constraints for a numeric types isn't available at this time, I attempted to solve this issue by checking the type of T and then perform the conversion explicity. private static byte [] GetBytes<T>(T value ) { byte [] bytes; ushort val1; uint val2; Type t = typeof (T); if (t == typeof ( ushort )) { val1 = Convert.ToUInt16( value ); bytes = BitConverter.GetBytes(val1); } else if (t == t

How To Create Or Generate PDF Reports Or Files Using DinkToPDF in .NET 5 or .NET Core Console Application

Image
Good day! In this tutorial, I will demonstrate on how to create or generate PDF reports or files using DinkToPDF in .NET 5 or .NET Core Console Application. This library is a C# .NET Core wrapper for wkhtmltopdf library that uses the Webkit engine to convert HTML files or page to PDF and was developed by 'rdvojmoc Rok Dvojmoč' from Slovenia. To begin with lets start by establishing the project structure. Project Structure 1. Create a .NET 5 or .NET Core Console Application Project. 2. Add DinkToPDF and Unity packages using NuGet. 3. Copy the libwkhtmltox (dll, dylib and so) files from DinkToPDF and attach those files to your project. Make sure to set the Copy to Output Directory attribute of those files to Copy Always . Note that there are two versions for these files,32 and 64 bit. 4. Create three folders to the project and in each folder add the empty classes or interface shown in step #6. 5. Add an empty html file called ReportTemplate inside the project and set

Using Microsoft.Extensions.DependencyInjection In .NET 5 or .NET Core Console Application

Image
Team, Here's how to incorporate the Microsoft.Extensions.DependencyInjection namespace and it's ServiceProvider class in a .NET 5 or .NET Core Console Application project. If you're an ASP.NET Core MVC developer, you might recognize how it is applied in Startup.cs for Dependency Injection specifically ConfigureServices() method wherein the AddTransient() method is utilized to map an interface class and it's implementation type. To begin with, lets by creating a .NET 5 Console application project and follow the steps below. Project Setup 1. Add the Microsoft.Extensions.DependencyInjection package to your project via NuGet. 2. Create three folders, new classes and interfaces based from the image below. Models Add two model classes specifically Employee and Product with three properties for each class. Product.cs public class Product { public int ProductCode { get ; set ; } public string ProductName { get ; set ; } public double Prod

Sharkoon SKILLER SGS2 Gaming Chair Product Review

Image
Team, A week ago,I decided to purchase a gaming chair at a local computer shop in one of the malls here in Cebu since the piston of my old office chair does not work anymore. I did canvass at several stores but I'm not amazed by the brands that they were selling.While most of the chairs' upholstery that were presented to me were made of leather, the Sharkoon SKILLER SGS2 Gaming Seat was made of fabric and the price is just within my budget. That's why I decided to purchase this item. The main features of Sharkoon SKILLER SGS2 Gaming Chair based from the main website Sharkoon SKILLER SGS2 Gaming Chair are: A. Breathable and Supple - which describes the upholstery that is entirely made of soft fabric. B. Versatility through Adjustability - denotes the adjustable backrest, ergonomic posture, 3D armrest and seating height. C. Comfortable Extras - these extras include suspension and tilt control system, large 60 mm wheels and a backrest which can be reclined and locked

How To Persist Input Control Values In Bootstrap-Table On Paging, Filtering And Searching In ASP.NET MVC

Image
Team, When working with the Bootstrap-Table by Wenzhixin in a specific project, I encountered an issue which is the value of input controls such as checkbox and textbox were lost when I performed searching, filtering or pagination of the Bootstrap-Table. I tried several solutions presented in github and the documentation such as setting the properties of data-maintain-meta-data or data-maintain-selected to true and much more. After a few hours, I did found the solution in the documentation which is Saving Row Data Using Input . The solution is to fetch the current value of the control and call Bootstrap-Table updateRow method to preserve the values. The entire page is shown below including it's JavaScript code. @{ ViewBag.Title = "Home Page"; } <div class= "row" > <div id= "divPeople" class= "col-md-12" > <div class= "table-responsive" > <table id= "tblPeople"

How To Insert Or Add Emojis In Microsoft Teams Status Message

Image
Good day Gents! I was trying to update my Microsoft Teams status and was wondering if I can add or insert emoji. For editing or adding new teams status, only text fields are available and there's no emoji icon similar to writing a teams message. After googling for a few minutes, I found this link Emoji's in status which is a feature request in Microsoft Teams User's Voice Forum. So far this upgrade request only has thirty votes which is relatively small and may be considered a low priority for the product team to implement. Given the limitations at hand, I tried several approach including copying an emoji in a chat message which didn't work and later found a solution using Microsoft Outlook 365. First is to create a new email message in Microsoft Outlook and press (Window Key + .). The emoji dropdown control will appear. Next is to select the emoji that you wanted to add to Teams. Copy the emoji from the newly created email message template and paste that to Micr

Donate